Wednesday, February 10, 2010

I'm in the mood for love...

...and I love chocolate.

So, what's a Swiss miss like me going to lay on my lovies this Valentine's Day...I'm thinking we're gonna have a fondue freak out.

Not that Charlie and the kids are first-time fonduers.

In fact, Carly's last birthday party was a Swiss-themed extravaganza complete with cheese and chocolate fondues, a cake shaped like a dairy cow, Swiss flag decor everywhere(toothpicks, napkin rings, candles, balloons, t-shirts), Edelweiss confetti...and even paper napkins with Heidi's little face emblazoned on them...


Here's the famous cow cake. I tried to make her stand upright but she fall down...go boom. I think I like her this way better...


Why, you ask, would a fourteen-year-old girl yearn for such a celebration (other than her DNA-encoded obsession with cheese and chocolate)? Perhaps it has something to do with the GIANT box of Swiss tchotkes collecting dust on our junk closet shelf. Mind you, this is just the tip of the Matterhorn, so to speak.


We've got pillows, beach towels, calendars, books and fanny packs shoved into drawers all over the house and pounds and pounds of Swiss chocolate that is, let's just say, no longer with us. Check out those Heidi paper napkins in the middle of the box...awesome!


You see, about ten years ago, Mom got a letter from a long-lost Swiss cousin. She had just had a baby girl (my cousin, not my Mom!) and, as an English teacher, was anxious to connect her young family with some real-live American relatives. So, these cousins (we're talking the real deal here...peasant blouses, dirndl skirts, snow-capped mountains, shuttered chalets, yodel music, cows with bells...the works) made the connection and over the years we've gotten to know each other by trading trinkets via airmail.

By now, Mildred (the little Swiss girl) must have the most impressive collection of Barney, Brittany and Hannah Montana t-shirts, tote bags and pencil sharpeners of any girl her side of the Alps. For sure, more than any family that flies the Stars and Stripes, we must hold the record for most wacky items brandishing the Swiss flag. I bet you don't have egg cups like these. In fact, I bet you don't have egg cups, period.


Anyway...back to fondue.


Aside from being one of the most delicious desserts on the planet, it is also one of the fastest and easiest to prepare. And, since we're talking Valentine's Day, what could be more romantic than gazing through the flicker of the fondue flame into each other's eyes over a silken pot of molten chocolate. Or, in our case, what could be more fun than wrestling over that same pot with two sugar-crazed kids and big daddy over the last cube of pound cake (the more likely scenario at our Valentine's table). Whatever your scene...chocolate fondue never disappoints.

Let's get fonduing...

Chop 8 ounces of great-tasting chocolate (I like bittersweet). This is Ghirardelli 60% Cacao Bittersweet.


Pour 1/2 cup of cream into a heavy saucepan and heat until it begins to steam (don't let it boil). Remove the pot from the heat, add the chopped chocolate and let stand for a minute or so while the chocolate begins to melt.

Stir the mixture until it is smooth and glossy then stir in 1-3 tablespoons of Grand Marnier, or to taste. I think I'll stick with 1 tablespoon this time so flames don't shoot out of my kids' ears ...it's pretty potent stuff but I think it makes the fondue special. Try other liqueur flavors if you're not an orange fan or a little vanilla and grated orange zest if you choose to go booze-free.


Pour the mixture into your fondue pot and place over a low flame to keep warm. Or, if you don't have a fondue pot or are too lazy to get it out of the attic (that would be me), serve it out of the pot or spoon it into a pre-warmed bowl. Reheat it if necessary but it'll probably go so fast you won't need to.


Serve with your favorite dipping stuff. Here are some ideas: cubed firm pound cake, cubed Rice Krispy treats, pineapple, strawberries, bananas, sliced pears, sliced apples, marshmallows, pretzels, dried fruit...


Chocolate Fondue

Heat:
  • 1/2 cup of cream
Stir in until smooth:
  • 8 ounces of chopped chocolate (I use bittersweet).
Add in:
  • 1-3 Tablespoons Grand Marnier

Spoon into fondue pot over low flame and serve with your favorite dipping treats.

Serves: 4-6

Monday, January 25, 2010

Gobbled up...

Every year, about this time, I'm reminded why turkey is such a big deal come November.


If you're like me, you anticipate that unmistakable rich and smokey smell that will permeate the house all Thanksgiving day and before you've even had your first bite of bird, you'll eagerly anticipate the mile-high turkey sandwich, complete with all the fixins', that will be Friday's architectural masterpiece.


But, every year, about this time, I am also reminded why it takes me almost twelve months to invite my fat feathered friend back into the house as welcomed guest.


This year, it all started Thanksgiving evening with a lovely meal hosted by Alice and Ole (Charlie's Mom and Dad) at Meadow Club. It was spectacular...and what a treat not to have to cook this year...at least I thought. Well, I hadn't even had my first bite of professionally prepared pecan pie and I was already hankering for some homespun leftovers. So, as I chewed, I plotted...I'll cook another Thanksgiving at home on Saturday and invite some of my family that I didn't get to gorge with that day. The die was cast...


Saturday was fabulous, more bird, more stuffing (I tried a new recipe with toasted sourdough bread, roasted chestnuts and prunes this year that was crazy good) and all of the other usual suspects. Carly helped with everything, as usual, and Willy even had a hand in the feast scrubbing a couple of potatoes and snapping a few green beans.

When he tired of that, Carly kept him busy making these place cards (an idea I yanked out of Family Fun Magazine years ago...back when I thought I'd actually have time for stuff like this). Man...it's grand having a 14-year-old daughter!


Everyone left fat and happy and ladened with several Ziplocs filled with enough leftovers to fulfill their sandwich dreams. Even after all that, enough meat survived to turn the following week into a turkeyfest: turkey sandwiches, turkey and barley soup, turkey enchiladas, turkey tetrazinni...we were more stuffed than the bird herself.

Oh, I forgot! The day before Thanksgiving, Carly's 8th grade class (with the help of me and a few other moms) made Thanksgiving dinner for the residents of a local old folks home. More turkey, stuffing, green beans, cranberry sauce, mashed potatoes, gravy and pumpkin pie...all from scratch. The kids were awesome and so was the feast!


If that wasn't enough, Greg and Judy had their annual Christmas kick-off party the next weekend complete with their traditional, and much anticipated, barbecued turkey. It was spectacular, as it is every year, but I must say, after that weekend, my goose (I mean turkey) was officially cooked.


Christmas followed, and with it 33 pounds of prime rib that I cooked to serve 26 people including a baby and two vegetarians. You do the math...that's lots of leftover cooked cow.

For one week solid we fed off of the giant vat of prime rib minestrone I made from the bronto ribs not to mention prime rib french dip and plain old slabs of prime rib eaten a la Fred Flintstone. Enough with the meat already...

So, one afternoon, in desperation, I wandered out to my neglected garden to see if there was a hint of anything fresh, green, edible and/or not formerly mooing or gobbling. Here's what I found...


Humm....looks a little more like Sarah Connor's post-apocalyptic dream scene from Terminator II than the luscious bounty of green-grocery I was hoping for. Then, just when I was about to slump back into the house in defeat to gnaw on a bone, I saw this little patch of green in the upper planting bed...a surviving mini crop of arugula!


I yanked a handful out by the roots and, on my way back into the house, caught a glimpse of this little beauty, rising like a phoenix from the ashes of my pitiful little Meyer lemon tree.


What to do? Arugula, lemon...I've got some left over champagne in the fridge from Christmas...probably too flat to drink but...I'm thinking risotto. Yah...champagne risotto with Meyer lemon and arugula. Where's the beef? Not here. I'm in.


The secret to risotto is low and slow. Watch the onions and garlic...don't let them scorch. Then, pour in the rice.


Here's how the rice will look when it's almost done. Creamy, not globby, tender but with a little bite...not too mushy. Now you can add the rest of the ingredients.


I added a Parmesan crisp for garnish and I'm glad I did...I crumbled it over the top and the crunch was great.


Champagne Risotto with
Meyer Lemon and Arugula


Blanch in simmering water and mince to make 1/8 tsp.:
  • several large strips of lemon zest
Heat in a saucepan:

  • 3/4 cup leftover champagne
  • 2-2 1/2 cups chicken stock
Cook over moderately low heat until soft:
  • 2 Tbsp. olive oil
  • 1/4 cup minced onion
Add and stir until it smells great:
  • 1 large garlic clove minced and mashed to a paste with 1/4 tsp salt

Add and stir to coat:

  • 3/4 cups arborio rice (available at most markets)
Add:
  • 1 Tbs. fresh Meyer lemon juice
Add enough warm champagne/stock mixture to just cover and stir until absorbed. Keep adding liquid slowly, enough to just cover the rice, until all of the liquid is absorbed and the rice is creamy, tender but not mushy (it should have a little bite to it). Let each addition absorb before adding the next, stir frequently, and use more stock if you must to achieve the correct consistency. Remember, low and slow, baby.

Now add:
  • 3 Tbs. butter (I said no meat, not lowfat)!
  • 1/3 cups grated Parmesan cheese
  • 1/2 - 3/4 cup chopped arugula
  • salt and pepper to taste
Sprinkle with shredded or grated Parmesan cheese.
If you would like to make the Parmesan crisp, mound 1 Tbs. of shredded Parmesan per crisp on a non-stick surface (Silpat or parchment). Bake at 350 degrees until crispy (about 8 minutes).


Makes 4-6 servings as a first course.


Tuesday, December 22, 2009

Have a Chewy, Gooey Christmas

When Charlie and I were first married, I remember wondering what our first Christmas together would be like. Sure, we’d buy our own tree, decorate it with our few meager ornaments and call Mom for her Tom and Jerry recipe but what would our new family traditions look like?

Somehow, I knew that I wasn’t going to find a shiny new Baby Tenderlove under the tree like I did every year of my youth (check me out below complete with foam hair curlers) and Mom and I weren’t going to stay up until all hours wrapping home made Christmas candy.
I was also quite sure that Santa would not replace Charlie's cool bike that he totalled Christmas morning 1970 nor would he dance around the Christmas tree hand-in-hand with his Danish cousins singing traditional Christmas folk songs as he did growing up…at least I hoped he wasn’t…


Well, nineteen years and gallons of Tom and Jerrys later, I am happy to report that there is no shortage of Christmas tradition in the Christensen household. It seems that every year has seen the addition of a new “must do” lest the season not be merry. Gingerbread houses, candy cane cookies, Christmas card collages, our favorite Christmas morning wakeup song (blared by Charlie off of our beloved Stars Come Out for Christmas CD that I got free with the purchase of two Burrito Supremes and a Sprite)…ah yes, tradition is rich at Casa Christensen.

In recent years, we’ve decided to share the homespun Yuletide love with our friends in business as well. Could we order up a few Harry and David gift baskets and call it a day…sure…but where would the fun be for Donna in that? Could we have cards printed and send them off with computer-generated labels…you bet…but what else would Donna have to ponder as she drifted off to sleep if she couldn’t obsess over what sweet treat to make, what color ribbon to choose and how to create an original label on my dinosaur of a desktop complete with CWC logo?


Yes, I have issues…welcome to the twisted mass of blinking Christmas lights that is my brain from November 27-December 25!

This year’s treat of choice resulted in two weeks of chewy, chocolaty, caramel craziness. The recipe sounded easy enough (Chocolate Caramels with Sea Salt).


Now, I’ve made plenty of caramels in my day but I guess I forgot that every batch tends to turn out wildly different than the next and that no manner of ingredient, time and/or temperature control would produce consistent results. The taste was consistent, I must say, so I had that going for me, but one batch would be gooey and the next chewy as can be...go figure!

So, if you are one of the honored recipients of this year’s CWC treat we hope you enjoy them no matter what…chill them if they’re gooey (they’re perfect cold) and eat them at room temp of they’re chewy...if you chill them, you’ll break a tooth. I think they’re good both ways. If you choose to make them yourself, just go with the flow and enjoy them no matter what. Buy more ingredients than you need and expect to keep the less than perfect batch for yourself if you are planning on giving them as gifts.

Here’s what I started with.


My friend brought this cool salt back from Bali for me.


This is what the caramel looks like before and after it reaches the right color.


This is the perfect pan to pour your molten mixture into…see how I prepared it with parchment…this is important!


Use a greased knife to cut them into 1” squares and wrap them in waxed paper. Check out these special wrappers I bought at Cake Art…isn’t the package awesome…out of the 50’s!


Here’s how I packaged them…


Chocolate Caramels
with Sea Salt

Heat until just bubbling

  • 2 cups heavy cream
Remove from heat, add to saucepan and stir until melted

  • 10.5 ounces of bittersweet chocolate
In a separate heavy saucepan mix and melt over moderate heat

  • 1 ¾ cups sugar
  • ½ cup light corn syrup
  • ¼ cup water
  • ¼ tsp salt
Continue to boil caramel over moderate heat swirling from time to time until it is golden in color. Add chocolate and cream mixture to the caramel pot (it will really bubble up, don’t fear), stir and continue to boil until candy thermometer reaches 255 degrees. This is the tricky part…watch it…it changes temperature quickly.


Also, the consistency should feel somewhat thick but not blobby…remember, it will set up a lot when cooled. It is so hard to judge by consistency and candy thermometers aren’t always accurate. Another way to check is to drop a blob into a glass of ice water, pull it out and feel the consistency. It should set up like caramel, not too runny and not hard like a Tootsie Roll.

Stir in

  • 1 ½ Tbs unsalted butter
Immediately pour into a parchment-lined 8 x8 inch metal baking pan. Let caramel stand 10-15 minutes then sprinkle with

  • 2 Tbs flaky sea salt
Cool completely then invert onto a clean parchment-lined cutting board. Flip right side up and cut with a greased sharp knife into 1" squares.


Caramels keep wrapped tightly in a cool place two weeks.


Adapted from Gourmet Magazine December 2006

Thursday, November 26, 2009

Hey baby...looking for a date?

Well...it's a fig actually, but thanks for asking.

I'm not particularly proud to say this, but around the neighborhood I'm known as the local fruit hussy.

Patrick's plums, Joe's apricots, Larry's pears, Bill's lemons, Domingo's figs...and I have my eye on Andy's peaches. I dare say, the list goes on...

Come harvest time, my neighbors know to expect a knock on the door, or perhaps the familiar site of my hand groping blindly over the fence to snatch their low hanging fruit.

I've also been known to park my SUV along my neighbors' tree-lined driveways so I can climb up the hood and straddle the sunroof (don't tell Charlie I cracked it last fall) to pluck the juiciest specimens. The kids have gotten used to waiting in the getaway car, motor running...they just know to lean down low so that their friends don't see them as their mother commits several misdemeanors in the name of produce.

"Why not just bask in the bounty of our local farmers' market?" you ask. A few reasons...1.) sense of community...sharing like this just feels so old-fashioned to me and my friends know that when I come-a-knockin' they'll end up with less rotten fruit on their pavement and more pear chutney in their pantries 2.) the thrill of the hunt...nothing like swinging from a tree to earn your meal and 3.) I'm wicked cheap and this fruit is free!


So, the other day Domingo called to let me know that his figs were ripe-for-the-pickin'. Sure enough, I climbed up onto my potting shed table, peered over the fence and caught a glimpse of this little jewel of purple plumpness dangling just within my reach. I snapped a shot just before plucking it, along with as many more of its succulent sisters that would fit in the front pocket of my sweatshirt.


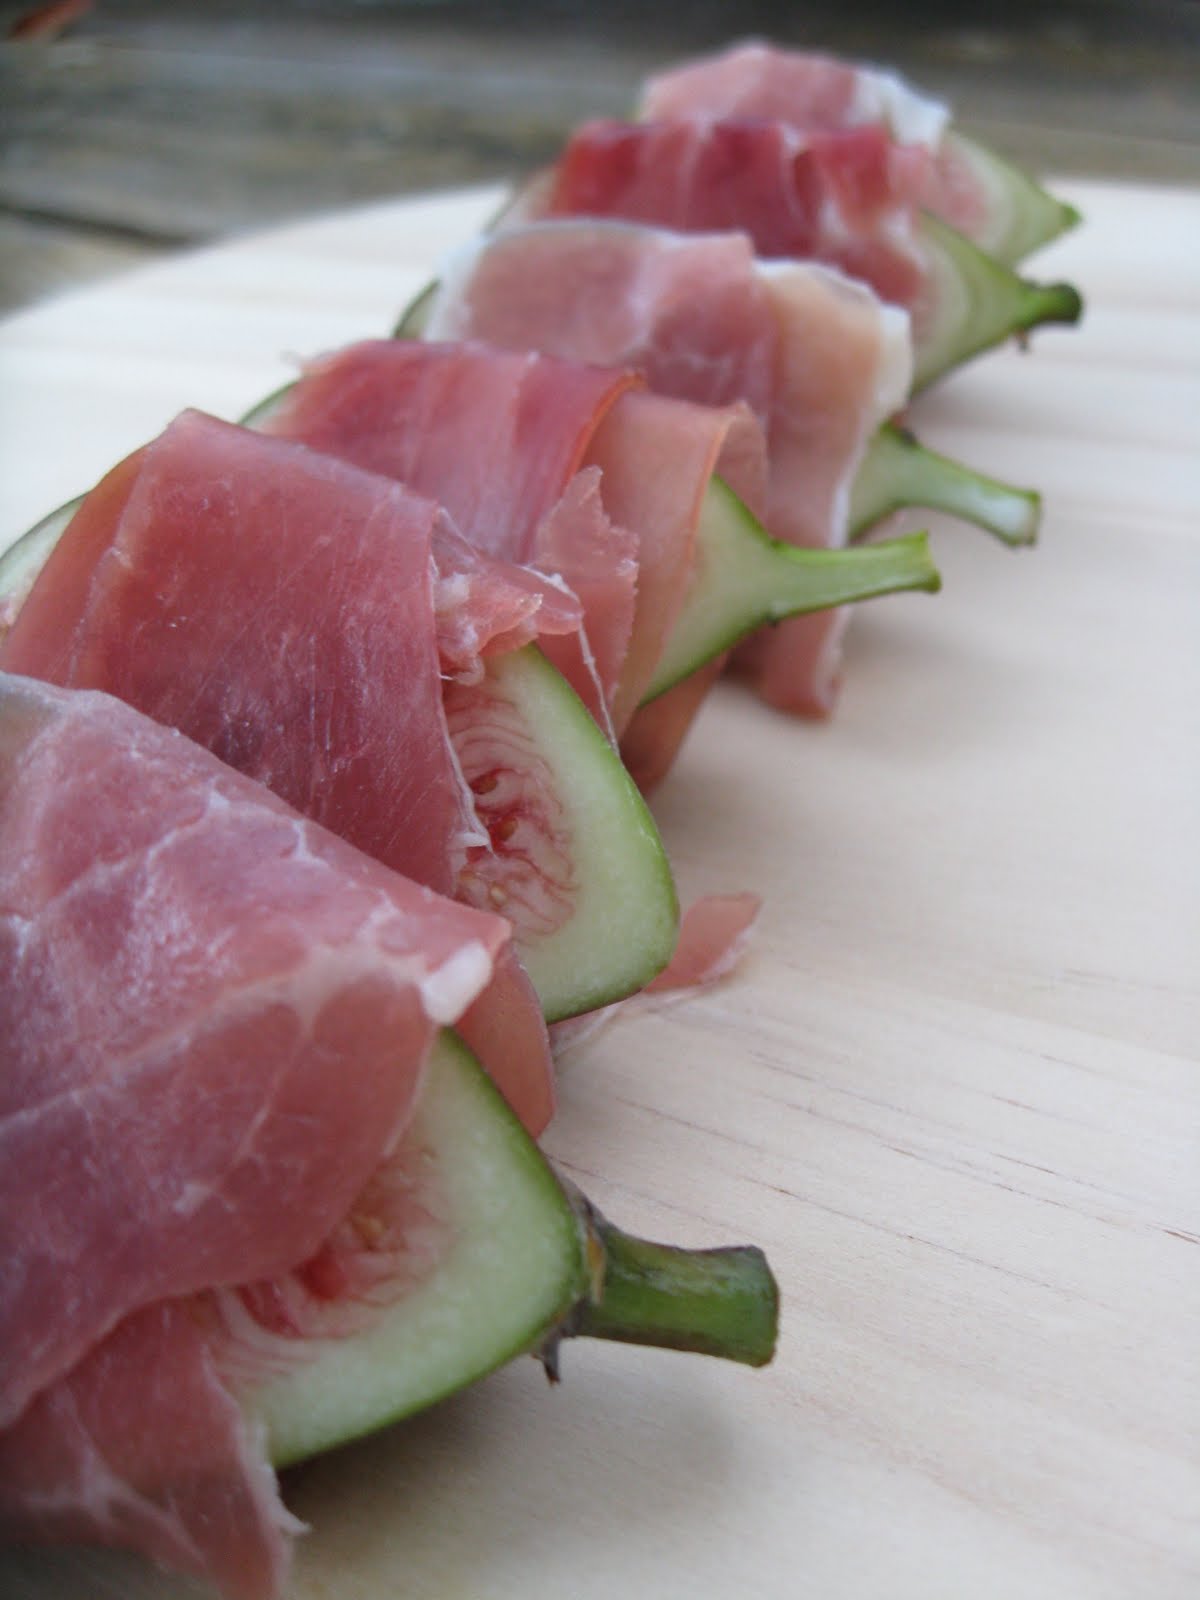
There's lots of fun stuff to make with these little beauties including fig jam, fig tarts, roasted fig appetizers but today I'm choosing to share with you the easiest and tastiest recipe of all...perfect as the starter of any fall menu or, as Carly and I have been known to do, enjoy alone as a fancy-feeling weekend light lunch when the guys are out eating large slabs of red meat somewhere else.


Thanks again Domingo for indulging my botanical kleptomania...and Bill...don't think I haven't noticed that those lemons look like they're juicin' up real nice...any day now. Kids...keep the motor running!


Roasted Fig Prosciutto and Blue Cheese Salad
with Lemon Balsamic Vinaigrette

Preheat oven to 350 degrees

For the dressing...

Mix:

  • 2 Tablespoons fresh lemon juice
  • 1 Tablespoon balsamic vinegar
  • 1 1/2 teaspoons honey
  • 1/2 teaspoon salt
  • pepper to taste

Whisk in:

  • 1/3 cup of olive oil

For the salad...

Slice lengthwise:

  • 4 ripe figs

Wrap figs in:

  • 8 generous slices of prosciutto

Roast figs on a baking sheet for about 10-15 minutes until they are soft and slightly caramelized.


Toss with dressing and divide among four plates

  • 5 cups fresh baby greens

Place 2 warm roasted figs on each plate of greens and crumble over

  • blue cheese to taste

Drizzle with more dressing to taste.

Serves 4

Try any combo of these variations: Double up on the amount of figs, mix blue cheese in with the dressing, slip the blue cheese under the prosciutto and roast with the figs, add candied nuts to the salad, try any other vinaigrette that appeals to you...this one is really unique and awesome:


Tangerine Vinaigrette

Mix in a small saucepan, boil and reduce by half:

  • 1/2 cup fresh tangerine juice
  • 1 1/2 teaspoons fresh grated tangerine zest

Transfer to a medium bowl and whisk in:

  • 1/3 cup vegetable oil
  • 1 Tablespoon balsamic vinegar
  • 1/4 teaspoon salt
  • tiny pinch of cinnamon

Thursday, October 29, 2009

Dr. Looney and The Brain...

Whoever said Halloween is all about the kids hasn't seen it go down in my house. Sure, sure the kids have a blast and everyone's happy and sugared-up in the end...just how it's supposed to be...but the month that leads up to the "big night" consists of a complex series of parent/child negotiations all centered around the kids' costumes.

Carly consistently can't commit until the last minute but Will, like most little boys, is enamoured with all things involving some sort of store-bought, polyester cape, large molded headgear and, most importantly, one or more highly destructive weapons.


Sorry kids...none of this fits in with my completely ego-driven conviction that any costume coming out of my house must be an original...the product of my blood, sweat, tears and Singer Classic. What would Halloween be without that tireless EBay hunt for an official NASA logo patch or that last minute, late-night run for silver spray paint critical for transforming last year's rain boots into footwear suitable for space travel?


It was much easier when they were babies. Carly was the easiest, of course. After the bumblebee and clown, every year that followed was some form of princess: Medieval Princess, Fairy Princess, Snow Princess, Just a Princess-Princess, Mermaid Princess, and Ballerina Princess...in that order, I think. For years, it was all about satin and glitter and tulle...I was in my zone.


With Willy, I got away with murder those first couple of years too. Year one, I made him the devil to Carly's angel (a prophecy still unfolding), followed by Baby Elvis (more satin and sequins...yes), then Cowboy, Astronaut and Mad Scientist (we'll come back to that) with a minor store bought Power Rangers slip in year-four. This year, I find myself battling the Evil Empire...all things Star Wars! The force just may be too great. He has his eye on some Stormtrooper-looking plastic get-up he spotted in a catalog but I think that Carly and I might have him convinced to go with Yoda (much more Zen don't you think?) and he is considering letting me make it...we'll see...


Hummm...how could this obsessive notion of costume control have been planted in my brain? Perhaps it has something to do with the Flying Nun...


Yes, this is me in the upper left hand corner, Sister Bertrille, posing alongside my fellow Cayuga Playground preschoolers circa 1968. Could I have simply donned a plastic bunny mask and fire-retardant jumpsuit from Woolworth, just like my other classmates...sure...but where would the fun be for Mommy in that?

I was only four but I swear I can still picture my mother perched on the edge of our black Naugahyde sofa wrestling with the burlap, cardboard and starch that would become my official Daughters of Charity nun habit . She still talks about the less-than-nunly language she mumbled under her breath as she twisted and glued and pried that headpiece until it bowed to her submission.

Mind you, as the awestruck baby sister of an official parochial school second grader, the notion of posing as a nun...a flying one at that...was beyond my wildest dreams. As you can see by the photo below, I was generally less than amused that my older brother was allowed to go off to Catholic school every day without me. "Yah...dressing like a nun for Halloween...that'll show him who's more holy!"


Mom made him a My Favorite Martian costume that year by the way (complete with homemade boingy, glittery antennae and a silver lame spacesuit)...pretty cool for a 7-year old who carries a briefcase to school, don't you think?

So, what does all of this have to do with Dr. Looney? Well, last year, we again entered into much discussion around Will's costume and settled on a Mad Scientist. Most of the elements were borrowed or handed-down but we did have fun creating some quicky custom accessories like a freaky specimen beaker and a Dr. Looney name tag retrofitted from one I borrowed at the last minute from a nice guy working the counter at Comforts.


But you know what...I still didn't feel like I had suffered enough on this one so I thought I'd bake a cake, of course, for good measure. Here's the one I came up with (one befitting the maddest of scientists, I think): a brain with electrodes sticking out of it and some bloodshot eyeballs thrown in for good measure. Just in time for Halloween, I give this "recipe" to my friends...and I know who you are...who share this need to express our love through stuff we create with our hearts and our hands. Thanks Mom for all the years of costumes and cakes and for showing your love for us in a way we appreciated then but understand even more today.


Dr. Looney's Brain and Bloodshot Eyeballs
(this is really more instructions than a recipe...)


Supplies:
  • 1- 8" or 9" cake pan
  • 1- 8" or 9" stainless steel bowl to match
  • 2- boxes of cake mix plus whatever you need to make the mix...usually oil, eggs and water (I used one white and one chocolate)
  • white frosting...I used a combo of a couple of tubs of store-bought plus homemade buttercream frosting (recipe follows) Can't remember exactly how much...sorry!
  • Food coloring (black and red, note: the gel type available at Cake Art works best vs. liquid
  • red decorator's gel (available in a little white tube at the grocery store)
  • 2 wooden craft dowels
  • bendy wire
  • green gummy lifesavers
  • dark purple Skittles
Directions for the brain:

Prepare the cake mix as directed and bake one in the cake pan and one in the stainless steel bowl. Use the left over mix to make as many cupcakes as you can. Cool.
Tint one tub of frosting pink.
Generously frost top of round cake pan cake then top with bowl cake, flat side down! Carve the dome with a serrated knife into a brain shape that pleases you. Coat the entire now-brain-shaped dome with pink frosting and place on a foil-wrapped piece of round cardboard (the pink shows through the grey a little which creates a cool fleshy effect).
Make your homemade buttercream (or try the tub-stuff...not sure of results) and tint with black food coloring to make it look like grey matter. Put in piping bag with large hole tip or improvise with a Ziploc with the end snipped to create the proper opening. Pipe squiggly lines on both hemispheres of the brain. This was my first attempt...you can probably do better by looking at diagrams of the brain on the Internet.

Now, wrap the bendy wire around the handle of a wooden spoon to make a coil then wrap the ends around the craft sticks as shown above to make your electrodes. Stick them into the brain then...voila...Dr. Looney is ready for his experiment!

Directions for the eyeballs:

Frost with white frosting. Place one green gummy lifesaver in the middle of the cupcake then insert the pupil (I think it was a dark purple Skittle that looked black-enough).
Use red gel icing to make the bloodshot eyes...that's it...easy huh?


Buttercream Frosting (the scariest part of the recipe...can you say hydrogenated?)


Cream with an electric mixer:
  • 1/2 cup solid vegetable shortening
  • 1/2 cup butter
Add:
  • 1 tsp vanilla extract

Gradually add and beat in:

  • 4 cups sifted confectioners sugar
Add at medium speed unitl light and fluffy:

  • 2 Tbs milk

Friday, October 16, 2009

Something's Fishy

Something weird happened this summer.

As I lay prone in my beach chair overlooking the spectacular Tahoe shoreline, frosty beer in one hand, John and Kate, Brad and Angelina, Paris and her new BFF in the other, it seems that something resembling a child’s small inflatable beach ring slipped itself under my muumuu and permanently affixed itself to my thighs. Apparently,a summer full of de-licious has converted into a backside full of boot-i-licious...emphasis on the "booty", not the "licious."

It came without warning. It just doesn’t add up. You do the math…

Didn’t all of those limes I shoved down into my Corona Lights (yes, Lights!) count toward my 5 daily servings of fruits and vegetables? Weren't my regular three block power walks to and from Garwoods Happy Hour classified as aerobic workouts? Was it wrong to think that 18 holes of pee wee golf would cancel out the ritual pre-match pizzafests?


Well, after a couple of months of denial and back to school excuses, all it took were a couple of foggy mornings and some frost on the windshield to remind me that my days of pull-on stretchy shorts, baggy T’s and that “you-caught-me-on-my-way-to-the-gym” look are numbered. Soon they will give way to the need for regular visits back to the office and a slightly more pulled together look...at least one that suggests that I regularly bathe.


I try to plug my ears and sing "la-la-la-la" really loud but I can still hear him...he's mocking me...that 500 pound blue gorilla standing in the middle of my room. He's pounding on my closet doors…my nemesis…his name is "jean." Like it or not, some one, way back when (clearly before the invention of my beloved Lycra), decided that blue jeans are a fashion staple and the ultimate in casual comfort. Says who? Well, like it or not, I must face my denim demon, re-expand my wardrobe, de-expand my derriere, and win the battle of the zipper now...before people actually realize that I don't even belong to a gym.


So, a few weeks ago, Charlie and I reconverted our "clothes tree" back into a working treadmill and began to substitute leafy greens for "Double Doubles with cheese" and non fat yogurt for our beloved Fairfax Scoop. It was OK for a while but after a week or so of broiled chicken breasts and steamed broccoli, I wanted to gag! "Enough!" I cried with indignation as I went running to my tattered recipe files vowing to find us something...anything...that had some flavor but wouldn't send us back to the dark side.


I found it...a crumpled magazine page I had saved from my days at Gourmet Magazine. I remembered it as the one that I used to parade around to my advertising clients to prove that we were a contemporary magazine...not stuck in the 1940's. "Yah," I thought, "this is the one...a fillet of snapper on a bed of steamed sweet potatoes, beautiful fresh veggies and this amazing soy ginger glaze...


Yikes...I forgot about all of the chopping...


and the peeling...


and the zesting...


and the sauteing....


Man...I forgot how many steps there were in this recipe...It's Tuesday night and it's 7 pm...we're starved!


But...those flavors! These are just some of the ingredients in this crazy, spicy, sweet glaze..

So here it is, over an hour later, but it was worth it...that shot of adrenaline to my flat-lined taste buds. The photo's not great (it's dark and I'm beat) but, trust me, it's beautiful and delicious. I think that the only thing that could make it better is dessert at Fairfax Scoop. I'll get a single...I promise.


Red Snapper With Spicy Soy Glaze
On Sauteed Vegetables And
Sweet Potatoes

For the glaze...

Mince and saute in heavy saucepan until soft:

  • 3 large shallots
  • 1 tsp vegetable oil

Add and simmer until reduced to about 3/4 cup (20 minutes... so make your fish now while it simmers):

  • 1/2 cup soy sauce
  • 1/4 cup water
  • 2 Tablespoons sugar
  • 2 Tablespoons apricot or plum jam
  • 1 Tablespoon peeled and grated fresh ginger
  • 1/8 teaspoon ground allspice
  • 1/4 teaspoon red pepper flakes
Stir in and keep warm:

  • 1 Tablespoon lime juice
  • 1/2 teaspoon grated lime zest
For the fish...

Julienne (thinly slice) and put aside:
  • 2 medium carrots
  • 1 red bell pepper
  • 3/4 cup snow peas
  • 2 cups Napa cabbage
  • 1/4 cup red onion

Peel, slice (8-12 slices, 1/4 inch thick) and steam over boiling water until just tender (keep warm in pan):
  • 1-3/4 pound sweet potato
Saute quickly until browned in a non-stick, lightly oiled skillet then finish baking in a 275 oven:
  • 4- 4 ounce red snapper filliets

Let's put it all together now...


Take your julienned veggies and lightly saute or keep raw (your preference) then add:
  • 1 cup chopped cilantro
  • 1 Tablespoon seasoned rice vinegar
Divide warm potato slices among four plates, top with warm or crispy cold veggies (your preference). Put one fillet on each plate then drizzle with warm glaze.

OK, it's really not as much work as it appears...just be organized and maybe make the glaze ahead for a weeknight meal. Enjoy!

Serves: 4

Adapted from Gourmet January 1998